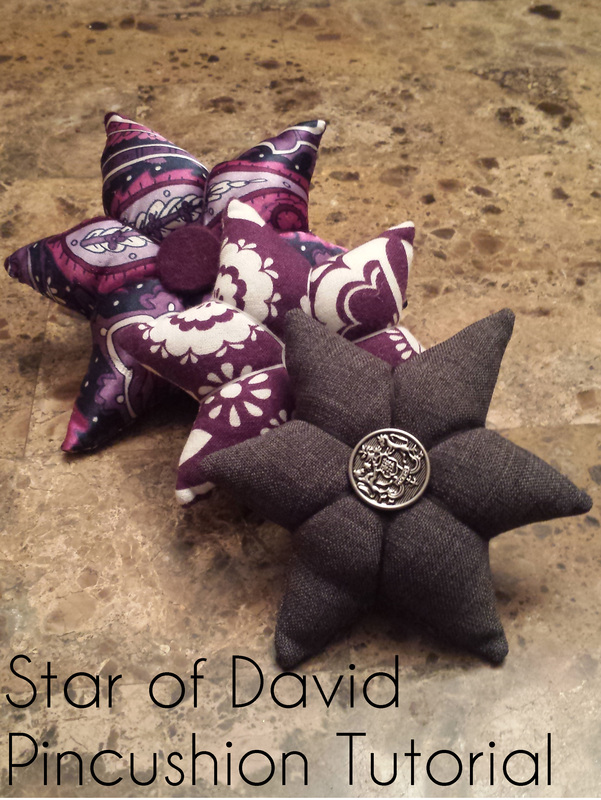
My first tutorial is going to be a repost of a tutorial I typed up and posted on Tumblr for a friend on mine a while back.
Tools & Materials:
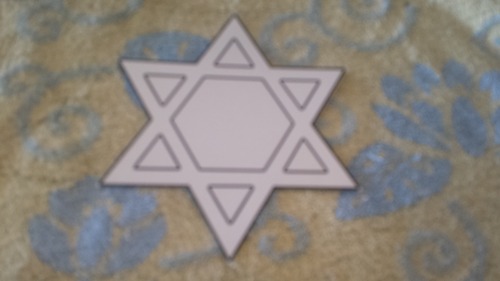
- A printing of the Star of David (or drawing) - The size depends entirely on how big you want the pin cushion, just keep in mind that it should be big enough so that your pins doesn’t come out the bottom of the cushion and poke you- for this tutorial my star is 7.25 inches from tip to tip this includes a 1cm seam allowance.
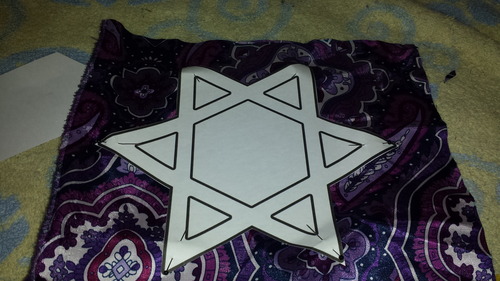
- Fabric Scraps - The measurements should be about an inch or so larger than the star - Mine is 9in long and 8in wide.
- Stuffing - You could use the insides of in an old pillow like I did.
- Needle & Thread
- Button - To go in the middle (optional)
- Extra Fabric - To cover the button (optional)
- Something Pointy – To help you poke out your points and stuff the cushion
Step 1: Print out and cut out (or draw and cut out) your Star of David
Step 2: Pin to fabric (wrong sides together) and cut out
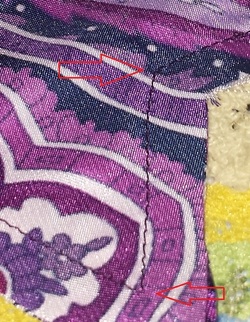
Step 3: With wrong sides still together sew the 2 pieces of fabric together following the shape of the star and leaving at least a 1in opening so that you could turn cushion right side out and stuff the cushion.
NOTE #1: Be sure to use at least a 1cm seam allowance, this will help you when you go to hand sew the closing
NOTE #2: Be sure to back stitch when you start and end your stitching so that your hole doesn’t get bigger when you’re stuffing your cushion
NOTE #1: Be sure to use at least a 1cm seam allowance, this will help you when you go to hand sew the closing
NOTE #2: Be sure to back stitch when you start and end your stitching so that your hole doesn’t get bigger when you’re stuffing your cushion

NOTE #3: Make sure you have sharp corners or your star will have a funky shape when completed
NOTE #4: Be sure to leave your opening in one of the inward points and not on one of the tips»that would be very difficult to sew closed (I don’t have picture of it because I forgot to leave it there)

Step 4: Snip the extra fabric at the tips of your star don’t cut too close to your stitching (it’s not necessary to trim the seam allowance but you can if you want to, just make sure you don't cut the seam allowance next to the opening)

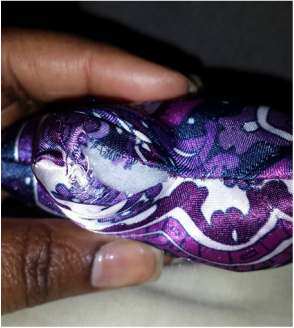
Step 5: Turn the cushion right side out making sure to poke out all of the points

Step 6: Stuff (My opening was not in the middle which made it more difficult to stuff and sew)
NOTE #5: If you’re using stuffing from an old pill and it’s matted into a flat shape, try pulling the stuffing apart and looking on the inside, you should find soft fluffy stuffing on the inside
NOTE #6: Be sure to fill the points first and then the middle
NOTE #5: If you’re using stuffing from an old pill and it’s matted into a flat shape, try pulling the stuffing apart and looking on the inside, you should find soft fluffy stuffing on the inside
NOTE #6: Be sure to fill the points first and then the middle

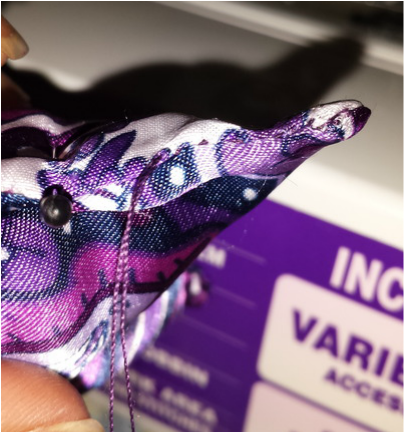
Step 7: Do an blind stitch (also called a ladder stitch) to close the opening (don’t know how? Here’s a video tutorial I found on YouTube :)
AND YOU’RE FINISHED!! If you want to be…if you want it to look more like mine then…
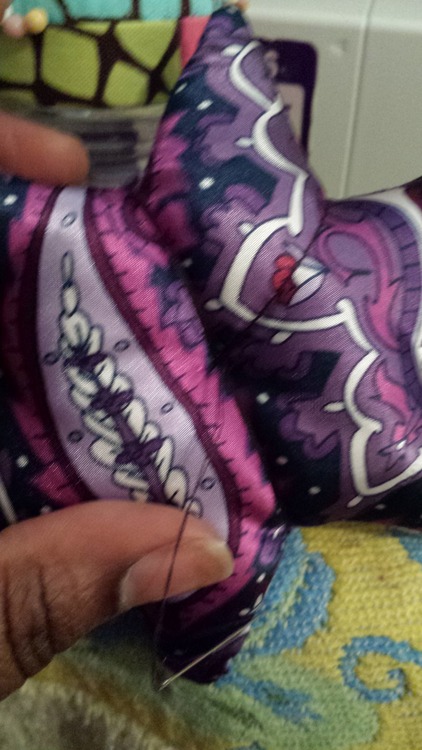
Step 8: Thread your needle and put it through the middle of the star, then go over one inward point and back through the middle of the cushion and pull the thread taunt to make a crease, do it one more time on the same inward point, repeat this on each inward point (how tight you pull depends on how defined you want your creases to be). When you finish, cut and tie your thread.
Adding the button (This is optional…I do it to hide the thread in the middle)
VERSION ONE: NO FABRIC
Simply take the button and line it up in the middle and sew like you would any button
Adding the button (This is optional…I do it to hide the thread in the middle)
VERSION ONE: NO FABRIC
Simply take the button and line it up in the middle and sew like you would any button
VERSION TWO: WITH FABRIC
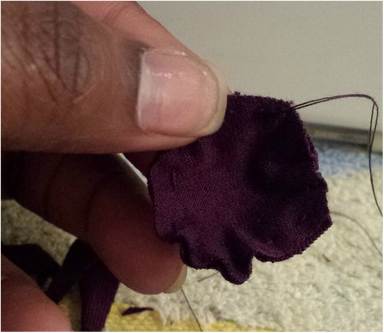
Cut a small circle out of your fabric »make it big enough so that the ends meet in the middle.
Take your needle and thread and slip stitch around the edge of the circle

Once finished, put the button in the middle and pull the thread allowing the fabric to close up around the button, then sew the button closed.
Without cutting the thread insert the needle and thread into the middle of the cushion and secure the button, then cut and tighten the thread. Then sew the button onto the middle of the pincushion.
Without cutting the thread insert the needle and thread into the middle of the cushion and secure the button, then cut and tighten the thread. Then sew the button onto the middle of the pincushion.


AND YOU’RE DONE…COMPLETELY!!! :)

 RSS Feed